 Save
Save My kitchen thermometer changed everything about how I cook chicken. Before that little tool, I was either serving rubbery, overcooked breasts or nervously cutting into pink centers at the dinner table. Now, oven baked chicken breast is my most reliable weeknight move, the kind of recipe I can start after a long day and still feel like I made something real. The smell of paprika and garlic hitting the heat never gets old.
I started making this recipe in big batches when my friend asked me how I managed to eat well during the week without losing my mind. We stood in my kitchen on a Sunday afternoon, and I showed her how pounding the chicken flat made everything cook evenly. She left with four seasoned breasts in a container, and by Wednesday she texted me a photo of her grain bowl. That felt better than any cookbook compliment.
Ingredients
- Boneless, skinless chicken breasts (6 to 8 oz each): Look for breasts that are similar in size so they cook at the same rate, and always pat them dry before seasoning or the spices will just slide off.
- Olive oil: This helps the seasoning stick and keeps the surface from drying out in the oven, plus it gives you a little bit of golden color on the edges.
- Garlic powder: I prefer powder over fresh garlic here because it distributes evenly and will not burn under high heat like minced cloves can.
- Onion powder: It adds a sweet, savory depth that feels more complex than just salt and pepper, and it is one of those ingredients you forget about until you leave it out.
- Paprika (smoked or sweet): Smoked paprika gives a subtle campfire vibe, while sweet paprika keeps things mild and a little fruity.
- Dried oregano or Italian seasoning: This brings in herbal notes that make the chicken feel Mediterranean, and dried works better than fresh because it will not scorch.
- Salt and black pepper: Do not skip the salt or your chicken will taste like cardboard, and freshly cracked pepper makes a noticeable difference.
- Lemon slices and fresh parsley or cilantro: These are optional, but a squeeze of lemon at the end wakes everything up, and the herbs make it look like you care.
- Simple marinade ingredients (optional): If you have an extra 30 minutes, the marinade adds a tangy sweetness that makes the chicken taste like it took way more effort than it did.
Tired of Takeout? 🥡
Get 10 meals you can make faster than delivery arrives. Seriously.
One email. No spam. Unsubscribe anytime.
Instructions
- Preheat and prep your pan:
- Set your oven to 400 degrees Fahrenheit and line a baking sheet with parchment paper, which makes cleanup so much easier. If you skip this step, you will be scraping stuck on chicken bits later.
- Dry and flatten the chicken:
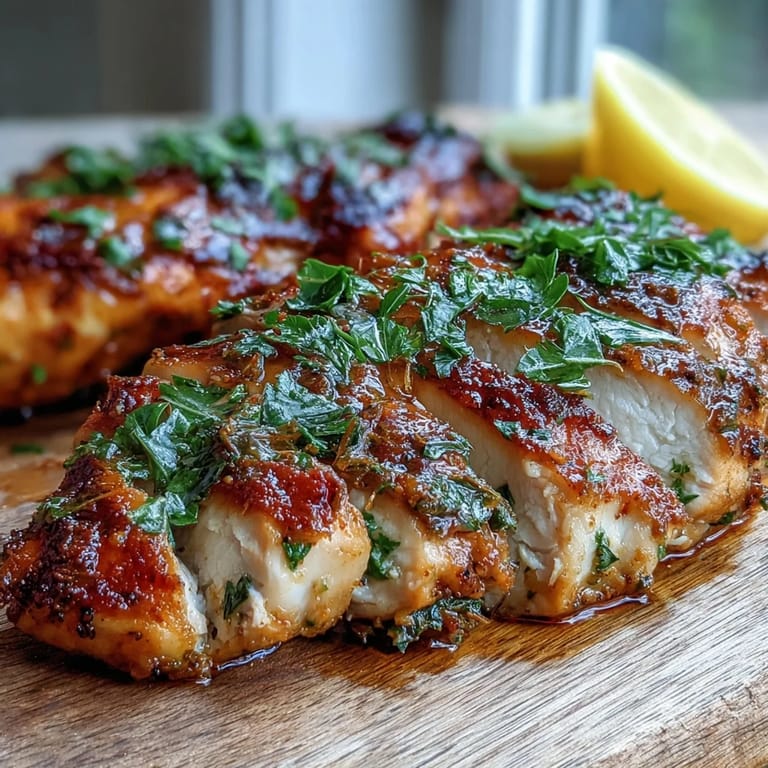
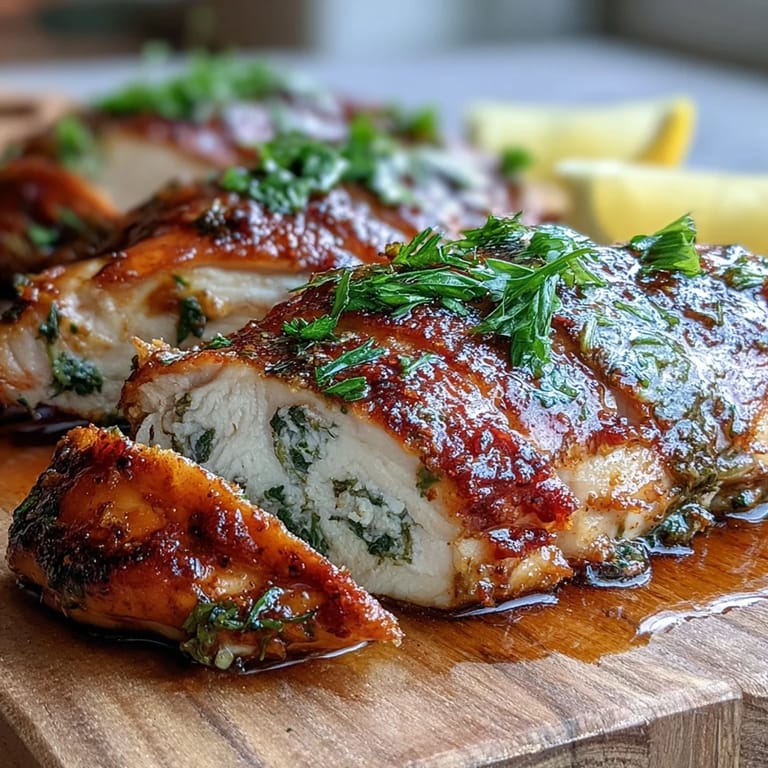
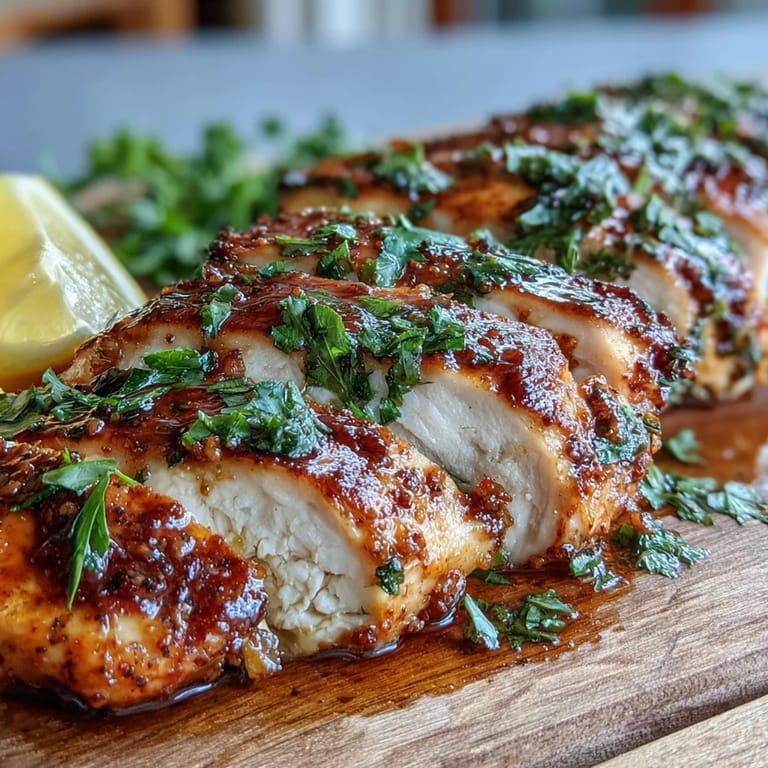
- Pat the breasts completely dry with paper towels, then place them between two sheets of parchment or plastic wrap and gently pound them to an even three quarter inch thickness. This is the single most important step for juicy chicken because thick spots stay raw while thin spots overcook.
- Mix your seasoning blend:
- In a small bowl, combine olive oil, garlic powder, onion powder, paprika, oregano, salt, and pepper until it looks like a thick paste. The oil makes it easy to spread and helps everything stick.
- Season the chicken:
- Rub the seasoning mixture all over both sides of each breast, making sure to get into any crevices. If you are using the optional marinade, let the chicken sit in it for 30 minutes to 2 hours in the fridge, then pat it dry before adding the seasoning.
- Arrange on the baking sheet:
- Place the chicken breasts in a single layer on your prepared pan, leaving a little space between each piece so the hot air can circulate. Crowding them makes them steam instead of bake.
- Bake until perfectly done:
- Slide the pan into the oven and bake for 18 to 22 minutes, checking the internal temperature with an instant read thermometer at the thickest part. When it hits 165 degrees Fahrenheit, you are done.
- Rest before slicing:
- Pull the chicken out and let it sit on the pan for 5 minutes so the juices redistribute instead of running all over your cutting board. Then slice, garnish with lemon and herbs if you like, and serve warm.
 Save
Save The first time I brought this to a potluck, someone asked if I had ordered it from a restaurant. I laughed and told them it was just chicken and spices, but they did not believe me until I wrote the recipe on a napkin. That moment made me realize how much we underestimate simple food done right, and how good it feels to share something that makes people happy without any fancy tricks.
How to Know When It is Done
The thermometer should read exactly 165 degrees Fahrenheit when you insert it into the thickest part of the breast, and the juices should run clear, not pink. I used to rely on timing alone, but oven temperatures vary so much that I ended up with inconsistent results until I started using a thermometer every single time. Now I never second guess myself, and my chicken is perfect every time.
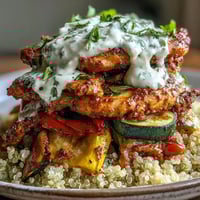
What to Serve It With
This chicken goes with almost anything, but I love it over a big pile of roasted vegetables or next to some garlic mashed potatoes. My favorite weekday version is slicing it thin and piling it onto a salad with cucumbers, cherry tomatoes, and a lemon vinaigrette. Sometimes I just eat it cold straight from the fridge with hot sauce, which is not fancy but feels like taking care of myself.
Storage and Meal Prep
Once the chicken is completely cool, I store it in airtight containers in the fridge for up to four days, and it reheats beautifully in the microwave or a skillet. I usually make a double batch on Sunday and use it throughout the week in wraps, grain bowls, and pasta dishes. The key is not reheating it too long or it will dry out, so I do 30 second bursts in the microwave until it is just warm.
- Slice it before storing if you want to grab and go for lunches.
- Freeze individual portions wrapped in foil for up to three months.
- Add a splash of chicken broth when reheating to bring back moisture.
 Save
Save This recipe is not about impressing anyone or following some complicated technique. It is about having reliable, delicious chicken ready when you need it, and knowing that dinner is handled even when nothing else is.
Recipe FAQs
- → How do I keep chicken breast from drying out in the oven?
Pound the breasts to even thickness so they cook uniformly, use olive oil to seal in moisture, and avoid overcooking by removing when the internal temperature reaches 165°F. Letting the meat rest for 5 minutes after baking also helps redistribute juices throughout the chicken.
- → What temperature should I bake chicken breast?
Bake at 400°F (200°C) for the best balance of crispy exterior and juicy interior. This higher temperature cooks the chicken quickly enough to prevent drying while developing nice color and flavor on the outside.
- → How long does it take to bake chicken breast at 400°F?
Typically 18-22 minutes depending on thickness. Use an instant-read thermometer to check doneness—insert into the thickest part and ensure it reads 165°F (74°C). Thinner pieces may finish in as little as 15 minutes.
- → Should I cover chicken breast when baking?
Uncovered is better for this method. Covering creates steam and prevents the exterior from developing any color or texture. Baking uncovered allows the spices to form a light crust while the interior stays moist from the olive oil coating.
- → Can I use frozen chicken breasts?
Yes, but thaw completely first for even cooking. Thaw overnight in the refrigerator or use the cold water method. Frozen chicken will cook unevenly and the seasoning won't adhere properly to the surface.